Enabling List View Export for an Object
Follow these steps to enable list view export functionality for any Salesforce object.
-
Step 1: Create a Visualforce Page
First, you need to create a Visualforce page for your object. This page will serve as the container for the list view export functionality.
- Navigate to Setup → Custom Code → Visualforce Pages
- Click "New" to create a new Visualforce page
-
Name your page using the format:
ListViewExport_[ObjectName]. For Example:ListViewExport_Account - Use the following code template:
<apex:page standardController="[objectApiName]" extensions="listviewexport.ListViewExportController"
           recordSetVar="records" showHeader="false" sidebar="false">
    <listviewexport:ListViewExport objectName="[objectApiName]" listViewId="{!listViewId}" />
</apex:page>
<apex:page standardController="Account" extensions="listviewexport.ListViewExportController" recordSetVar="records" showHeader="false" sidebar="false"> <listviewexport:ListViewExport objectName="Account" listViewId="{!listViewId}" /> </apex:page> -
Step 2: Assign Visualforce Page to Permission Set
After creating the Visualforce page, you need to assign it to the "List View Export" permission set to grant access to users.
- Go to Setup → Permission Sets
- Click on the "List View Export" permission set
- Under the "Apps" section, click "Visualforce Page Access"
- Click "Edit"
- Move your newly created Visualforce page from "Available Visualforce Pages" to "Enabled Visualforce Pages"
- Click "Save"
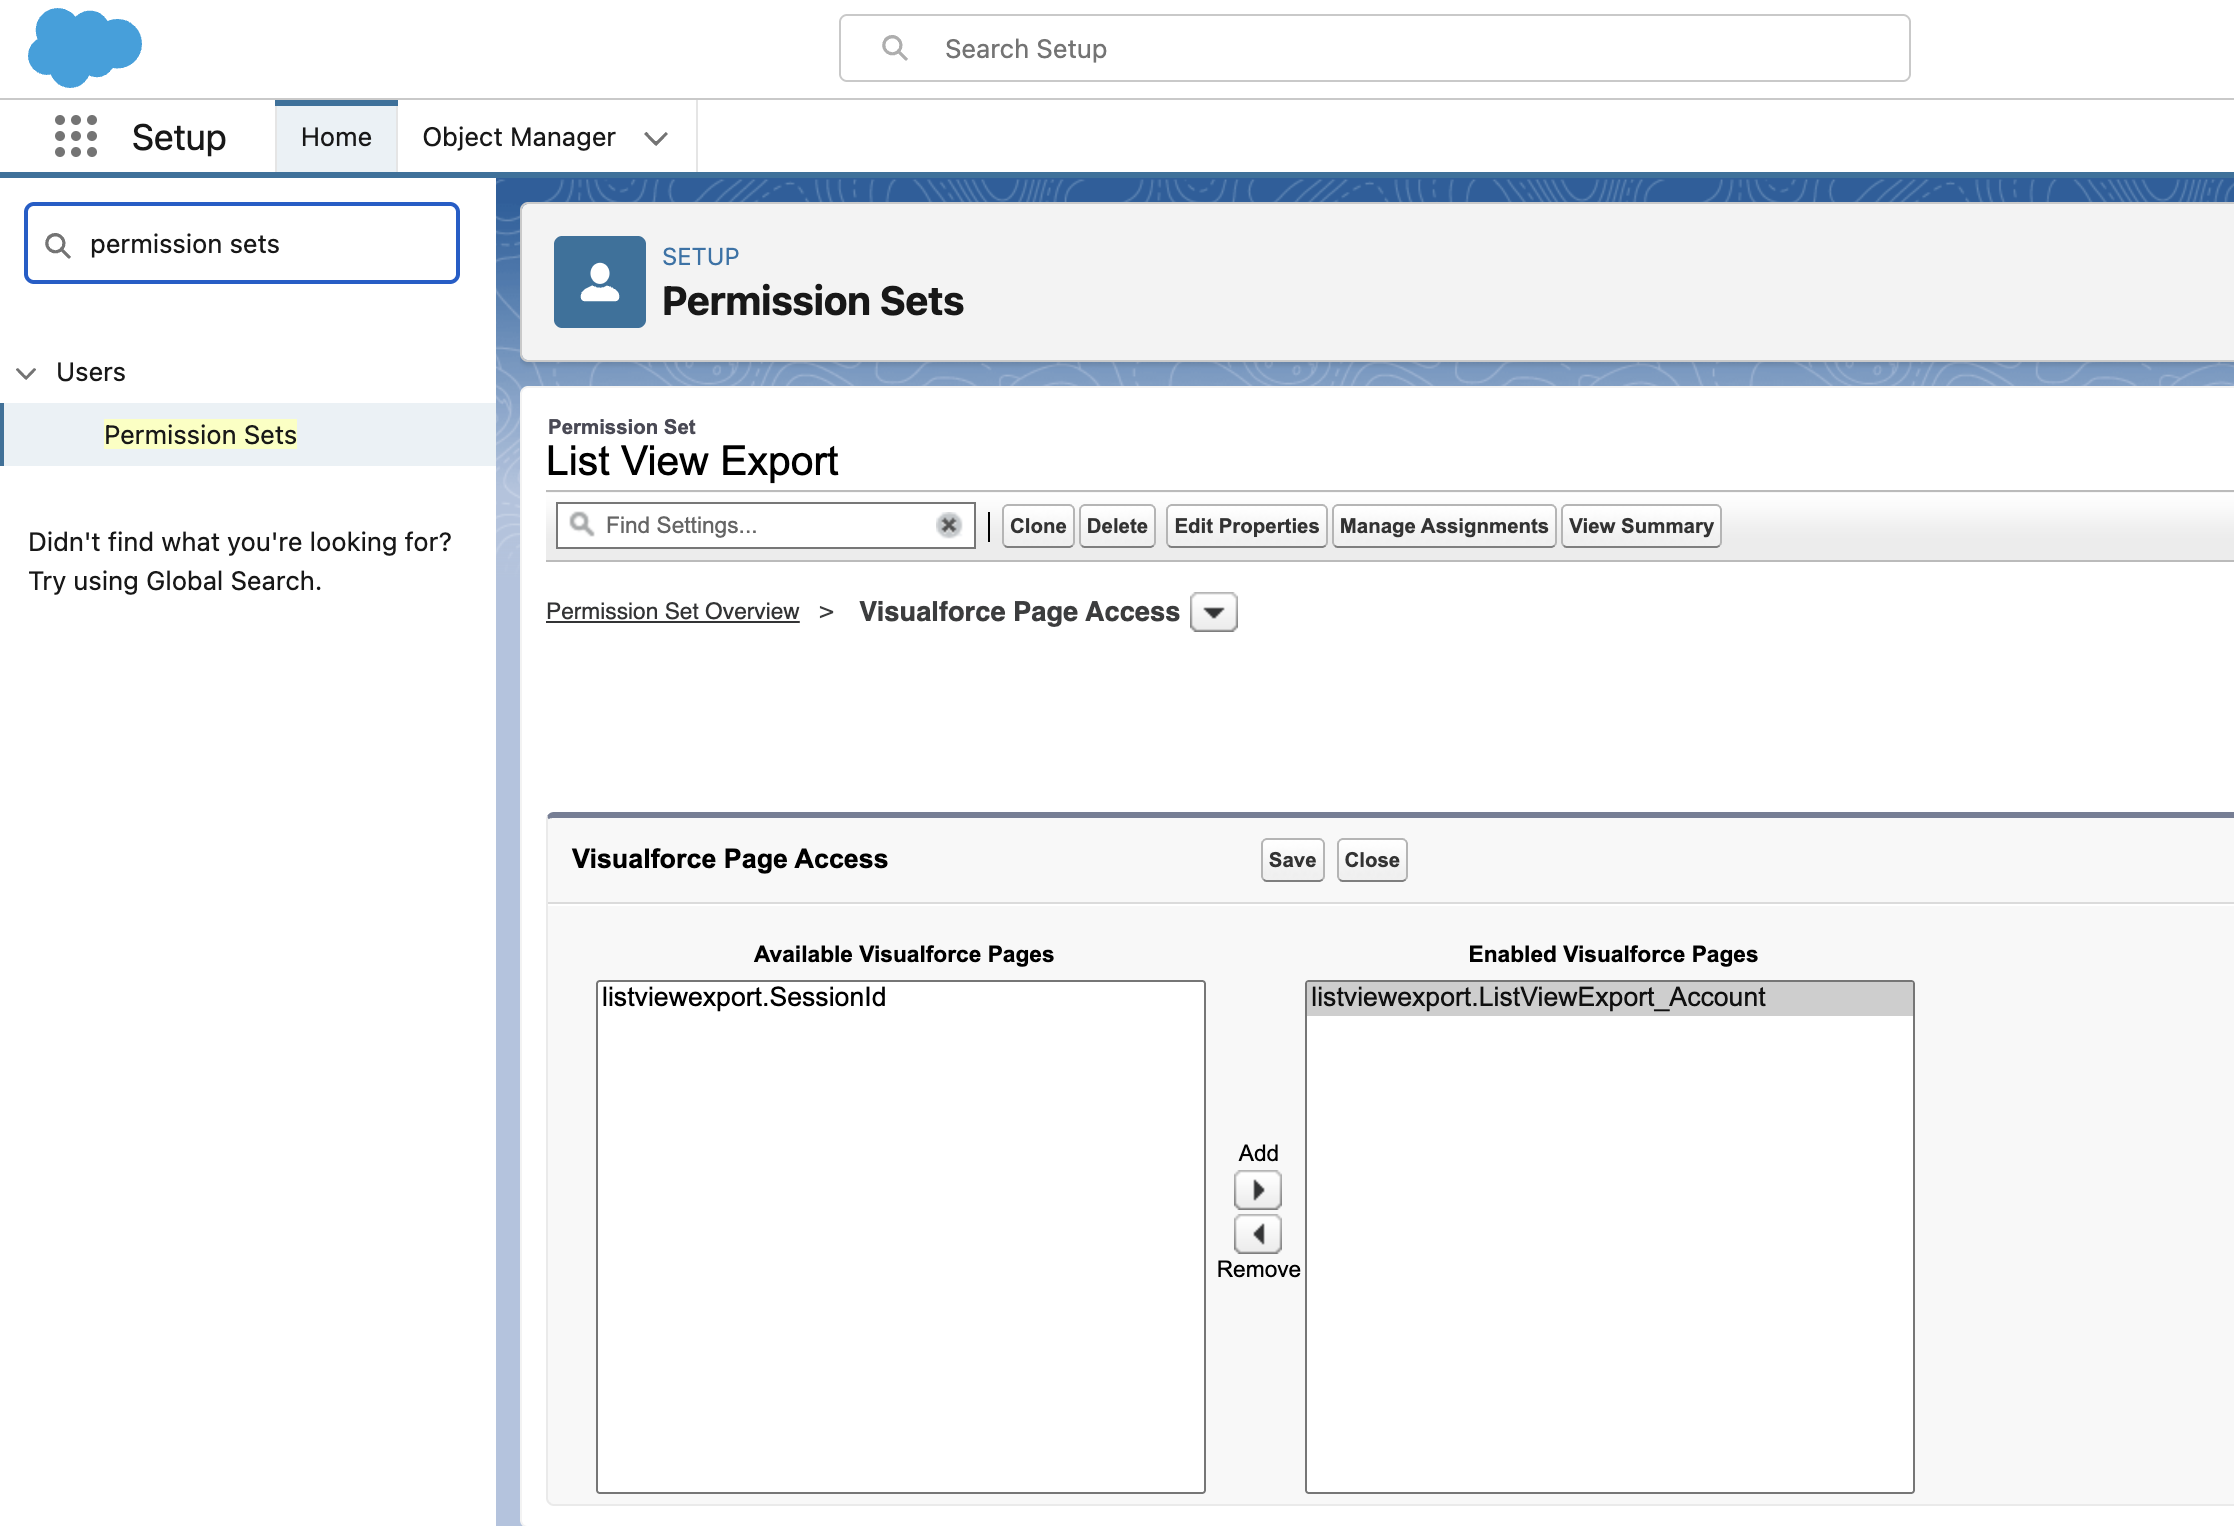 Assigning the Visualforce page to the List View Export permission set
 -
Step 3: Create List View Button
Create a custom list view button that will trigger the export functionality.
- Go to Setup → Object Manager → [Your Object] → Buttons, Links, and Actions
- Click "New Button or Link"
- Configure the button with these settings:
Label: "Export to CSV"Name: "Export_to_CSV"Display Type: "List Button"Behavior: "Display in existing window without sidebar or header"Content Source: "Visualforce Page"Content: Select the Visualforce page you created in Step 1- Click "Save"
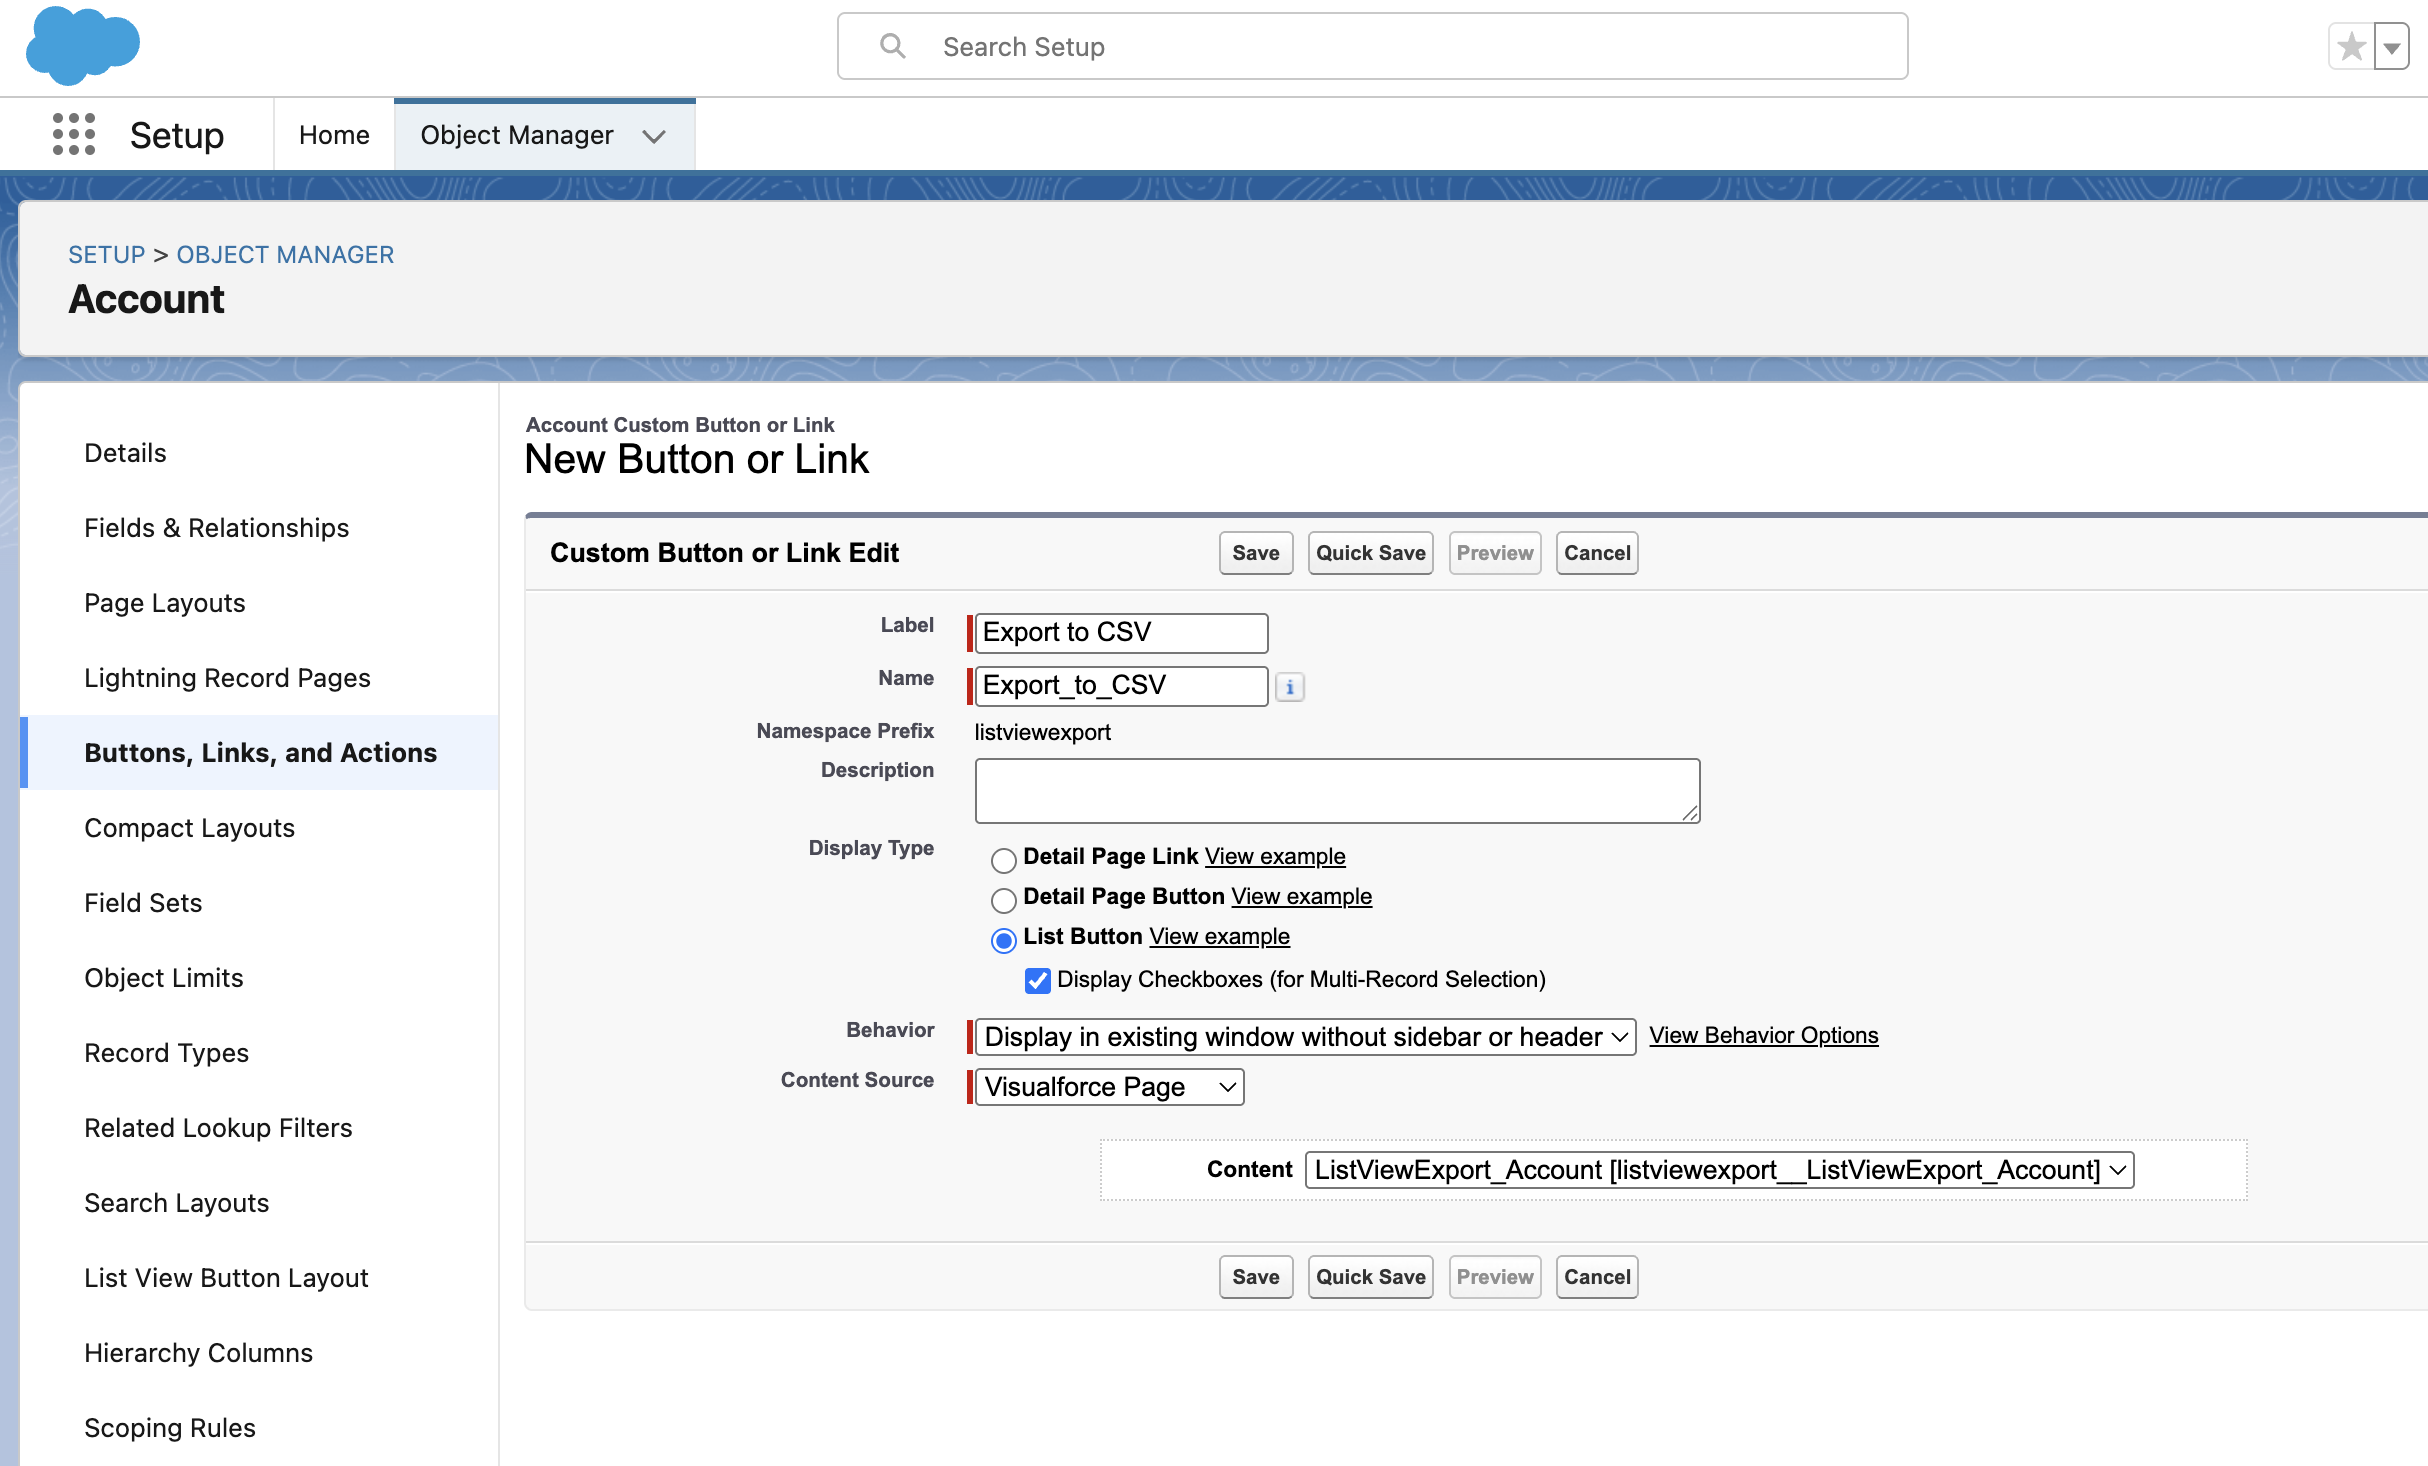 Configuring the Export to CSV list view button
 -
Step 4: Add to List View Layout
Finally, add the newly created button to your object's list view button layout.
- Go to Setup → Object Manager → [Your Object] → List View Button Layout
- Click "Edit" to modify the button layout
- Move "Export to CSV" from Available Buttons to Selected Buttons section
- Arrange the button position using the Up/Down arrows if needed
- Click "Save"